Booking Disney Dining Reservations
Booking Advanced Dining Reservations
Using the My Disney Experience Website & App
Actually using the My Disney Experience website or app to make your advanced dining reservations (ADRs in Dis-speak) is actually pretty simple. Getting what you want can be a little trickier.
Making reservations using the website
Step 1: Be Prepared
Your booking window opens up 180 days prior to your arrival. To be more precise, at 5:00 am central time for online reservations and 6 am if you’re calling in. If you’ve got your heart set on a specific reservation, you’ll want to be logged on and ready to go by
The website is notoriously glitchy. I often find I have the fewest problems using an Incognito window in Google Chrome.
If you’re trying for any of the harder to get reservations like Be Our Guest, Cinderella’s Royal Table, Chef MIckey’s, etc – then start with those, rather than going in consecutive order.
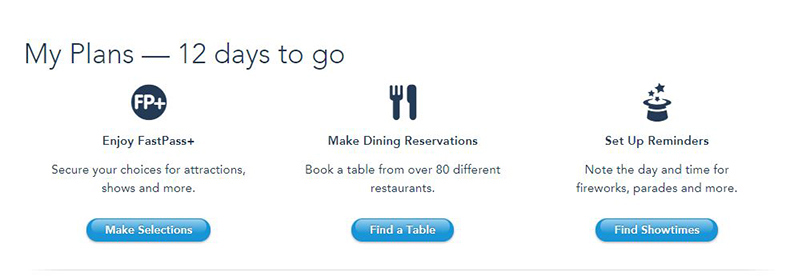
Step 2: Click on Find a Table
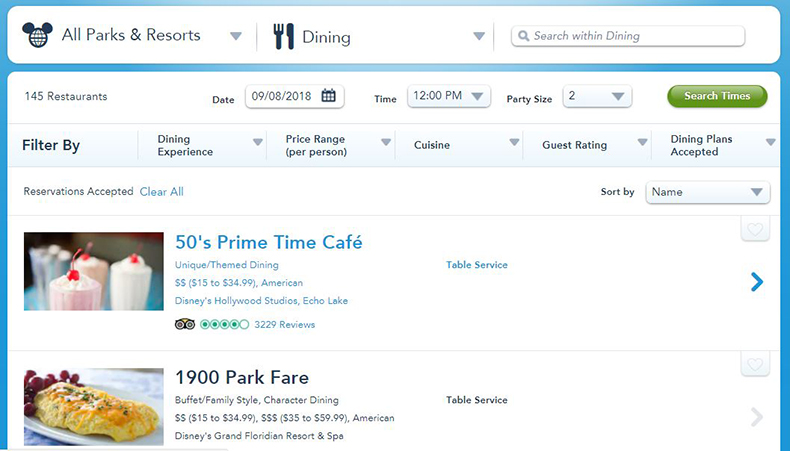
Step 3: Choose a Restaurant
Below is the reservation booking engine. You can browse all choices by scrolling, or narrow your choices by clicking on the All Parks & Resorts tab on the left to choose a specific park or resort, or filter by other options like dining experience (like Character Dining, Shows, etc), price range, type of cuisine, guest rating, and what type of dining plans are accepted.
This is great for doing research, but if you’re trying to make reservations at

Please follow & like us
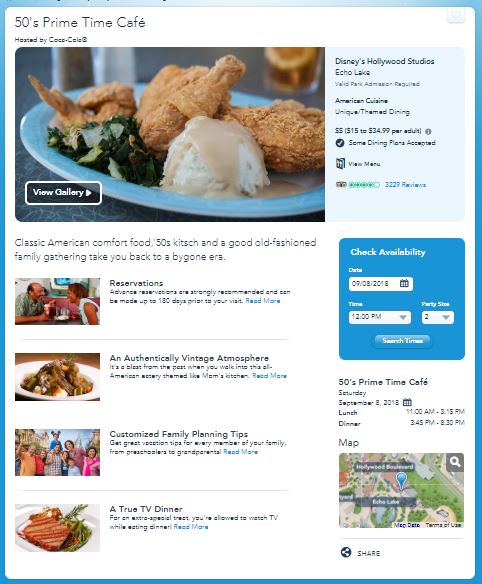
You’ll be taken to the main page for the restaurant, which is chock full of info, including a link to view the menu with pricing (in the light blue box next to the big picture).
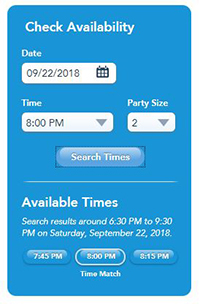
Step 4: Select a Time
Utilize the check availability box to search for times.
Step 5: Confirm Your Reservation
Tip: store your credit card information in your profile BEFORE you begin this process so you don’t have to enter it every time – this will save a lot of time and you can move on to the next reservation to be made.
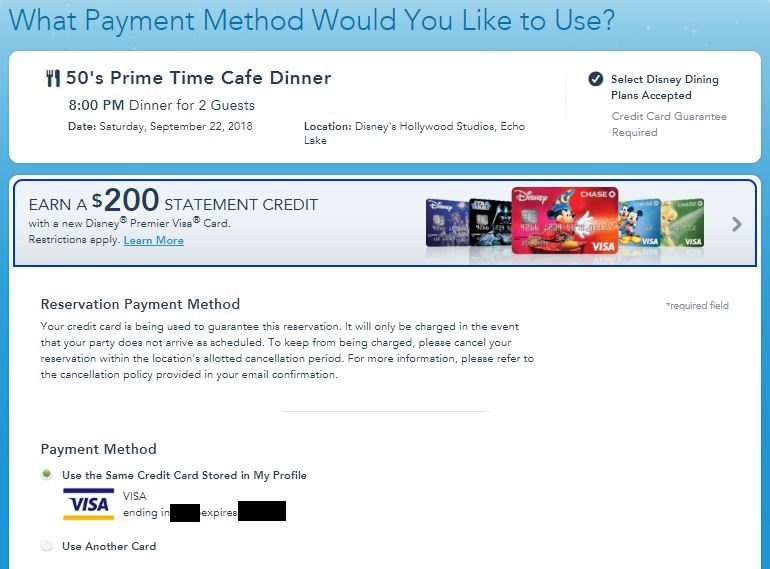
The next (and last) page you’ll go through requires you to enter your phone number and check a box indicating you understand all the policies. There is also a spot to enter any special requests like dietary restrictions. Then you click confirm and you’ll be given a confirmation number. Rinse and repeat for each
Tip: When you’ve finished making your reservations, go to the My Reservations and Tickets tab to view a list of all your ADRs. Take a screenshot and save this as a backup. Every once in a while, a reservation disappears from this system, so this way you’ll have proof.
Using the My Disney Experience App to Make Dining Reservations
As with the website, make sure you are logged in, your resort reservation has been linked to your account, and your phone number, address
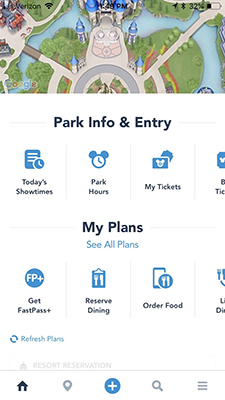
The home page of the app is shown to the right. If you scroll down, you’ll see your resort information (if you have already linked it.
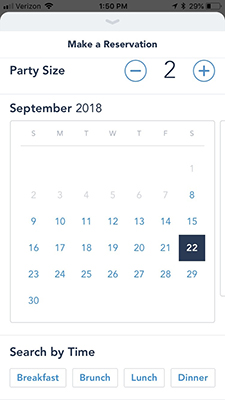
Click on “Reserve Dining” and follow the prompts. Initially, only the Party Size option will be visible. After you select that, the calendar will appear, then the search by time tabs.
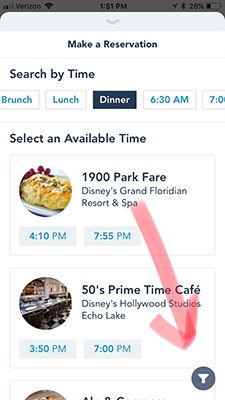
Next, you’ll be taken to the restaurant screen. You can narrow down the time by scrolling right or left. To select a restaurant, scroll down until you find it, or click on the funnel near the bottom right to narrow down your choices to a particular park or area.
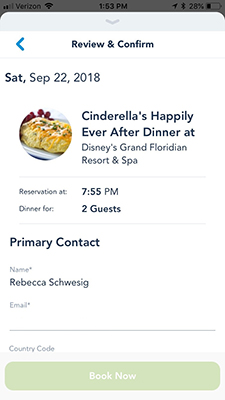
After clicking on the time of your choosing, you’ll end on a Review & Confirm page, where you’ll need to enter your email, phone number, and credit card and agree to the terms and conditions. You may also enter any special dietary requests.
Just like on the website, it will go faster if you have already saved your personal info and credit card under your profile.
As a service to guests who book their Disney packages through me, I’m happy to make your dining reservations for you if you provide me with a list. Contact me for more information at rebecca@magicaltravel.com